
I have dyed with tea and coffee for a while now and always loved the effect they have on fabric, giving things a more rich, aged quality. But for a long time, I have wanted to take this further and try other natural dyes, to go foraging in the woods nearby and take white cotton and linin and transform it.
And here is my first attempt.
Onion and Nettles
There is more to this that just putting the material in a pan of water and onion skins, obviously. So here is a quick run down of the steps I went through.
- assemble your ingredients
Onions
Go to the supermarket and get funny looks from everybody as you sort all the onion skins that have fallen off the onions into a bag. Grab a couple of onions too, into a separate bag. They were actually needed for tea that night (nicely the checkout girl didn’t charge me for the skins, just asked what colour they made.)
Nettles
Put thick gloves on and go to the nettles in the chicken area, and grab a couple of good handfuls. I had left these growing there on purpose for this, and ‘cause I had heard chickens liked them. Our chickens don’t and consequently they were growing quite nicely. Nettles can usually be found in any park where the grass is left to grow a bit, if you need to go further afield.
- Mordant your material
Firstly, wash your material to remove any fixing on it and to get it nice and wet. Then prepare it so the dye will attach and be permanent. This involved simmering, in a large tub of water containing Alum and Washing Soda. Now I have two books on natural dye. 1 said to simmer for 45 minutes and then you are good to go. The other leave to soak overnight. I went for a bit of simmering and then leaving overnight as I had run out of time and needed to get on with other things.
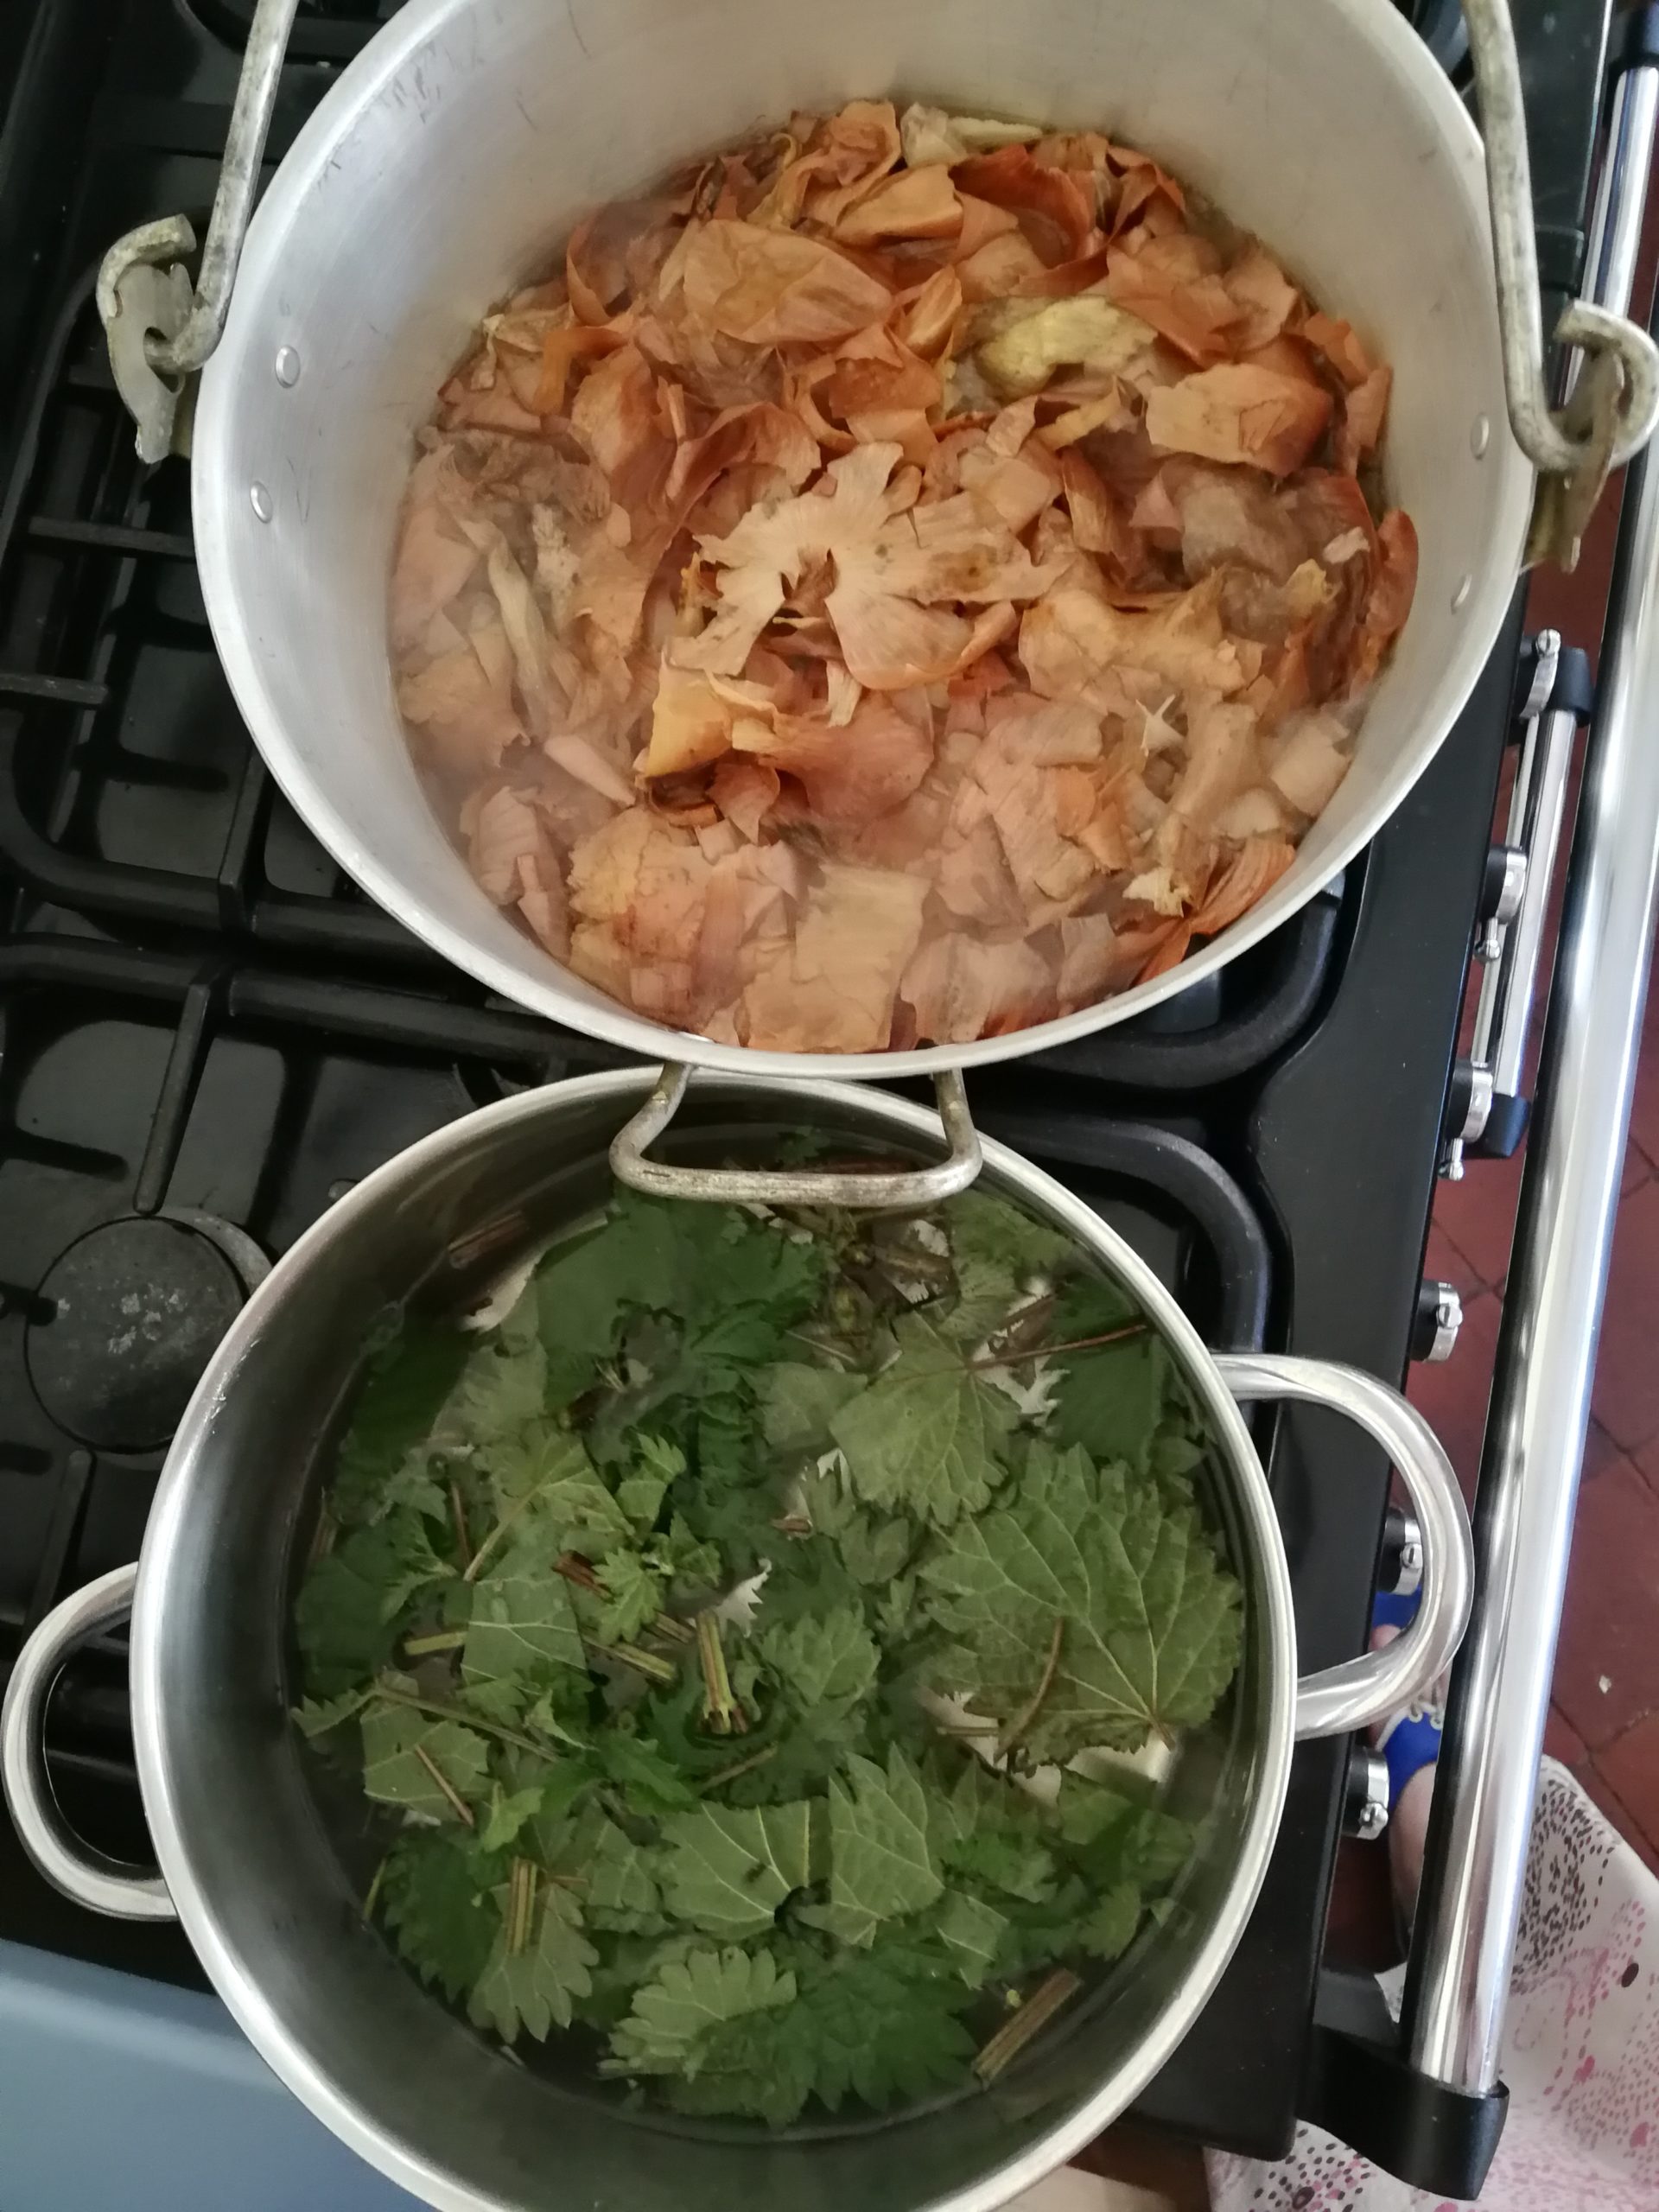
- Extract the dye from the ingredients
I did this by boiling the onion skins in a large pot of water. And the same for the nettles in another, after chopping them up. Holding the nettles with my oven gloves (no picture as the oven gloves are so dirty it’s untrue) and using scissors for the cutting so I had no chance of touching them. I left everything soaking, once boiled, for a good few hours. I’m not sure it made any difference, but I wanted to get as much dye out as possible.
- Do the Dyeing

I strained the nettles and the onions. All left overs went to the compost bin, and I put the liquid back into the pans. Next, I added the materials, put on a gentle heat and brought them up to a simmer.
The onion did great and within 30 minutes I was fishing it out and as I didn’t want it too dark. There was loads of colour in the pan still. So I quickly mordanted more material, only 45 mins for this batch, we will wait and see if it is as colour fast. And dyed up some more which after 20mins was a lovely pale-yellow colour so I pulled it out too. I am sure the dye bath could have done more but I was not really prepared. Next time I will know what to expect.
The nettles, now, they were more of a disappointment. The lovely green I was hoping for never really appeared and these simmered the entire time that I was messing around with a second batch of the onion dye.
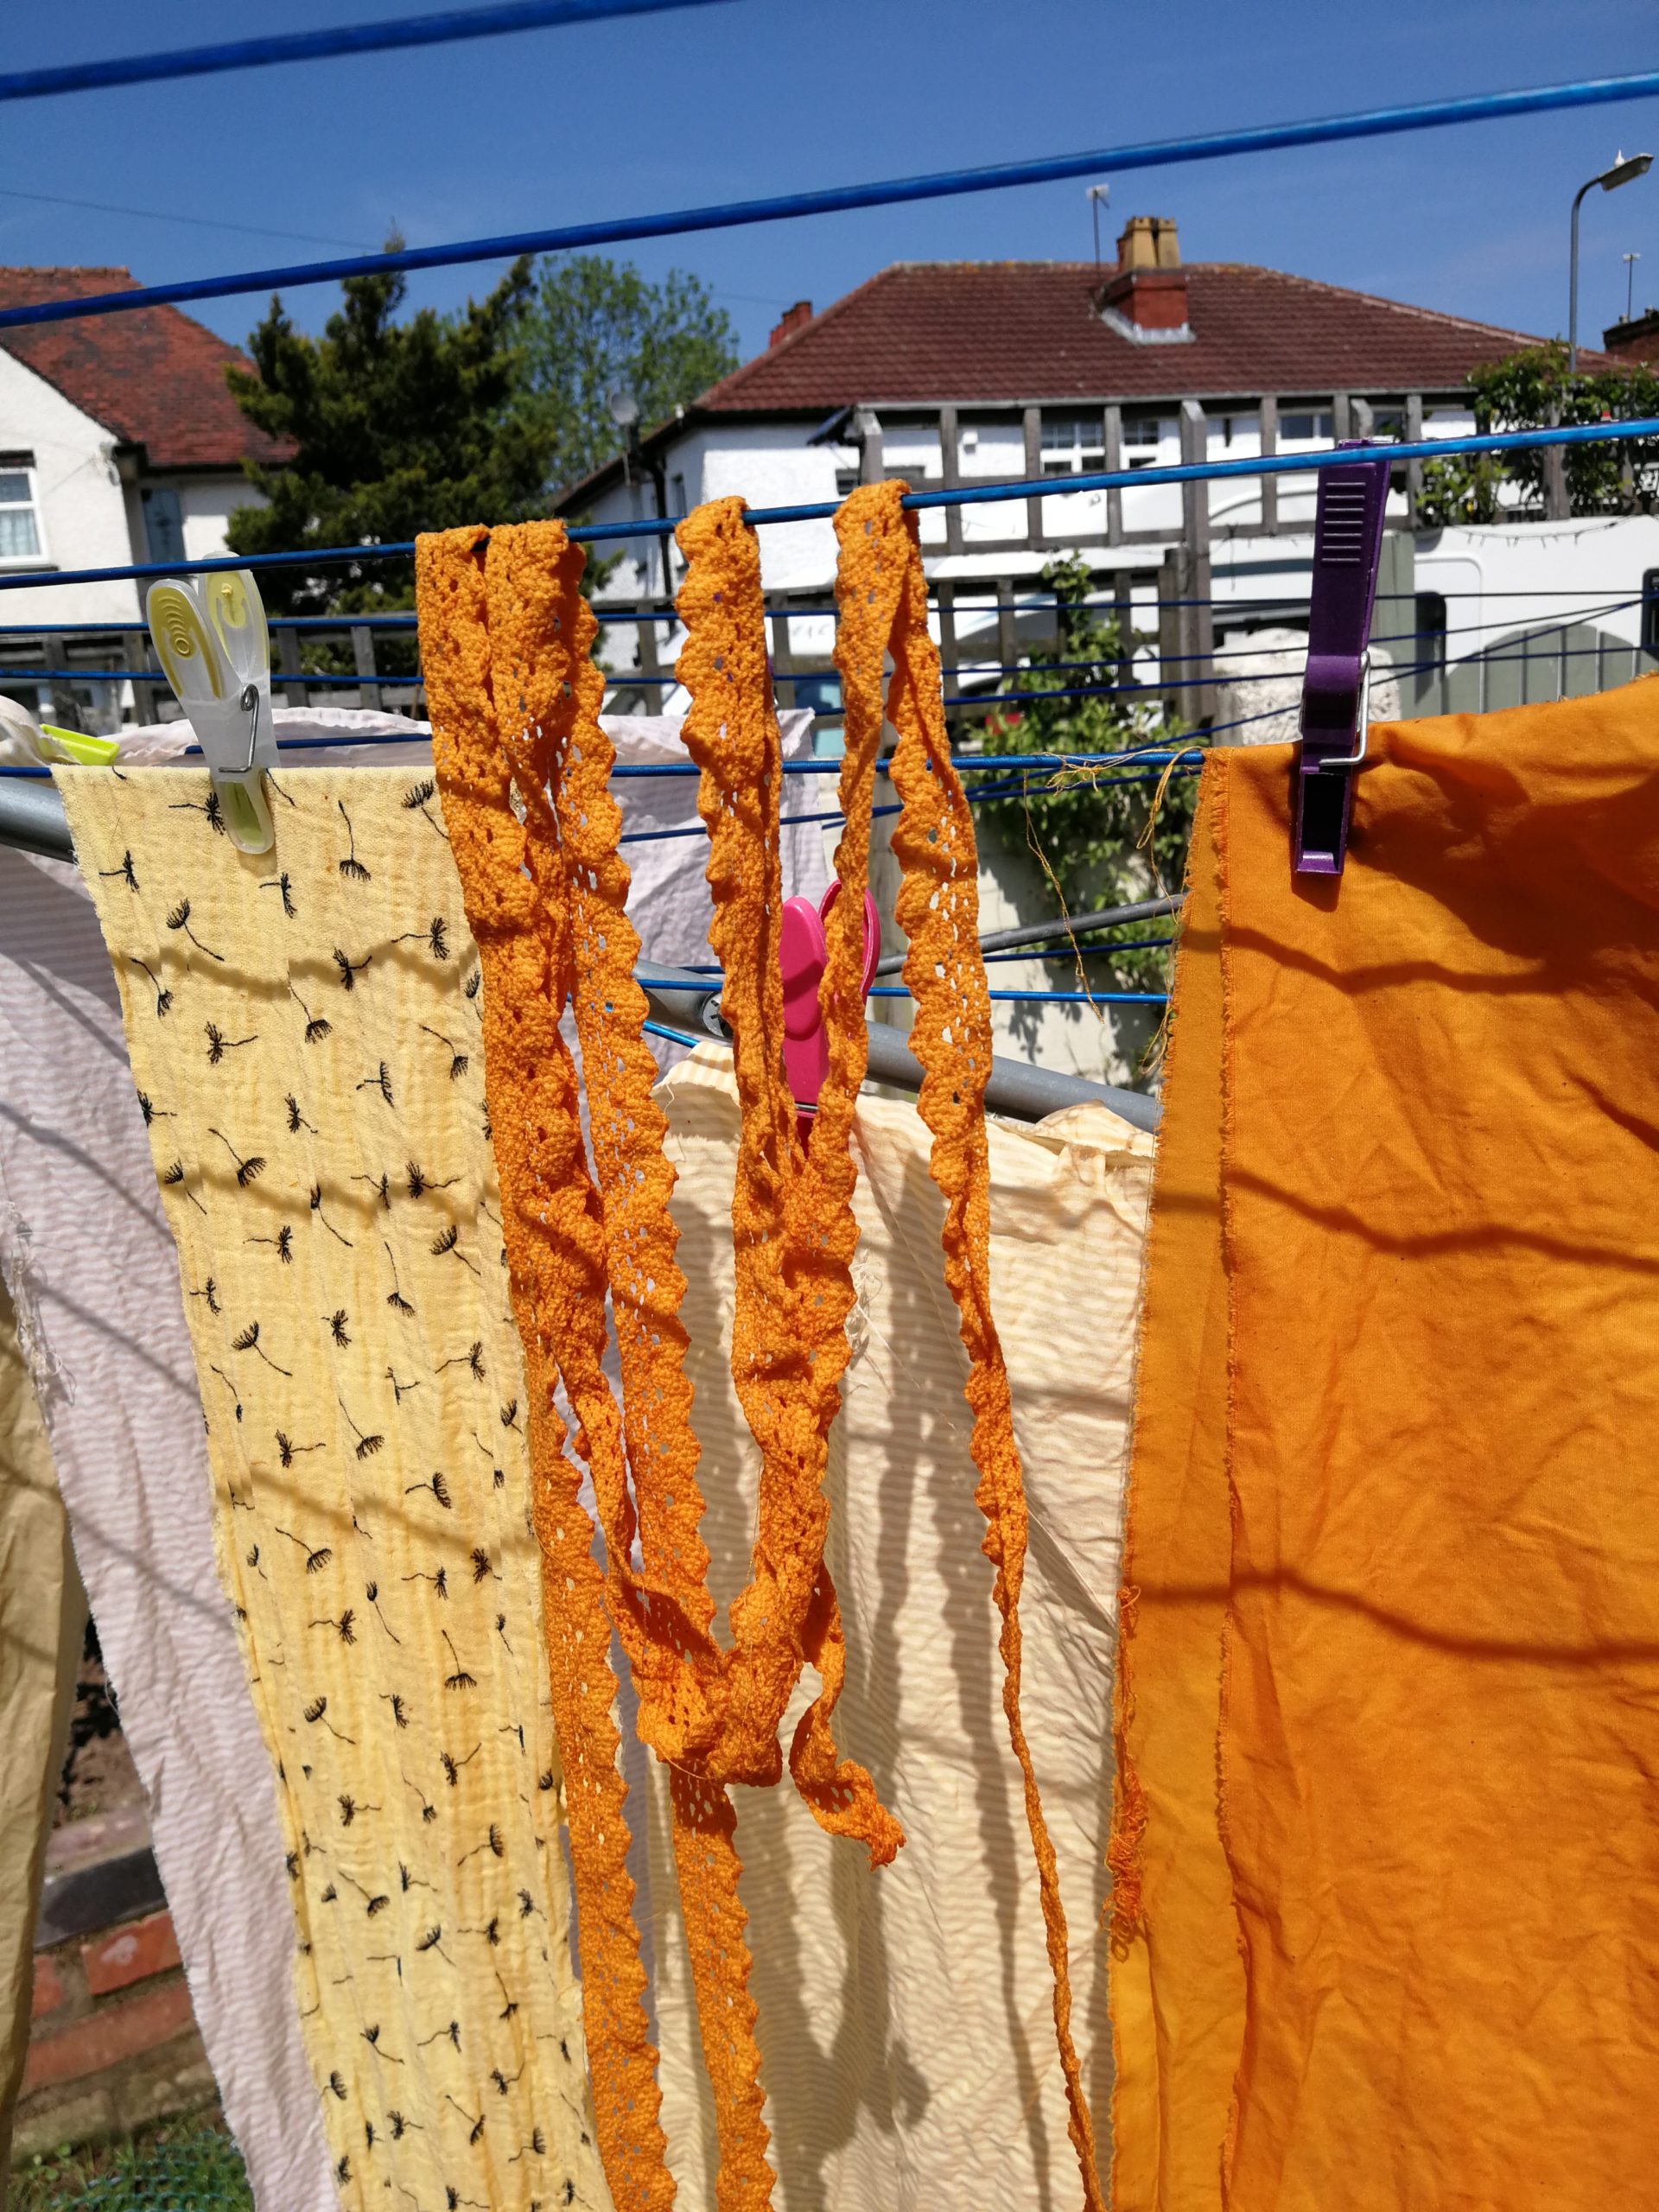
I think if I was to do it again I would use silk as the soft shimmer of the material might suit this green, but for cotton not worth the effort.
Next time
I would like to try elm bark next. I need a bit of time for this though as the bark needs to soak for a week to start to release its lovely pink/purple colour. Next week I am off to the Netherlands for the European Waldorf Doll Seminar. So there is no point starting bark soaking yet.
My next blog post will come to you directly for the Netherlands. I don’t know what it will be about yet. It could be doll related or it could be traveling around the Netherlands, or about Dutch lace (if I find any). Chances are I will mention just how awesome the doll making community is, I am so looking forward to meeting some of my doll making sisters. And I am really excited for my trip.
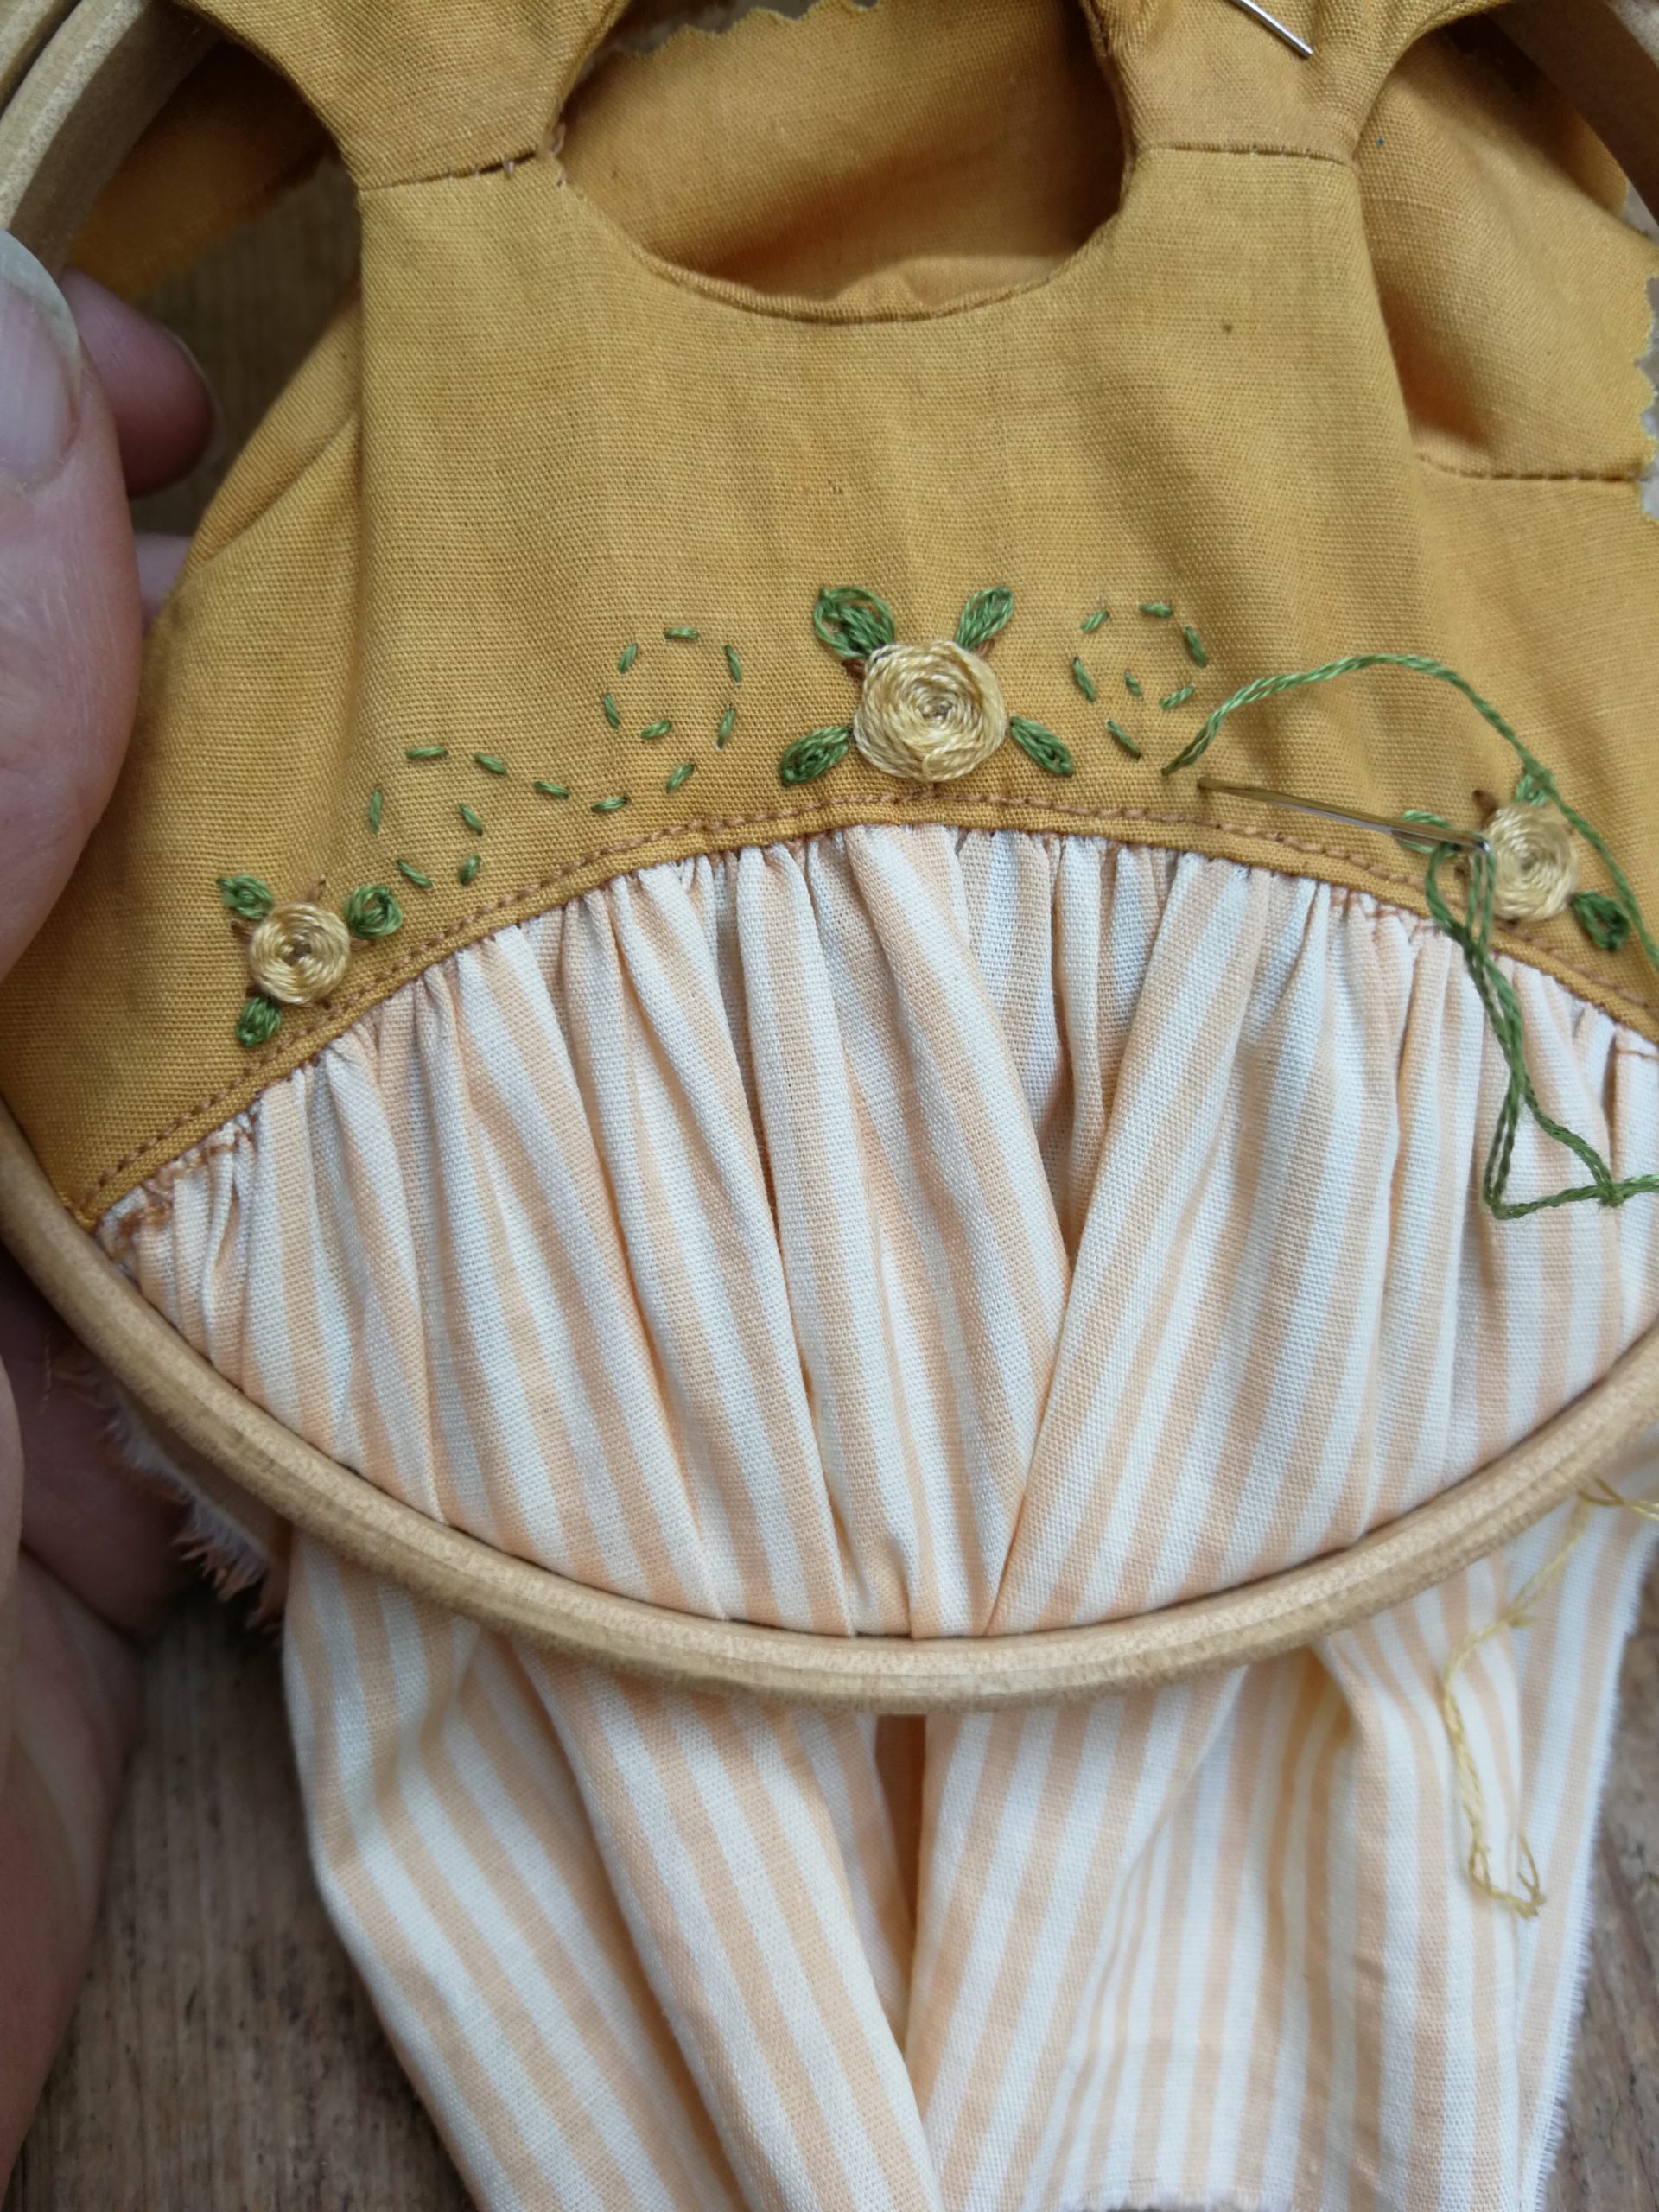
Here is a little dress being made from the dyed material. It will be for one of the dolls I shall be making at the seminar. I just hope I have made it the right size, as I didn’t have the doll to try it on.
So, until next time
Take care, slow down and smell the roses.
Ally